Here is quick tutorial on how to finish a jersey neckline, using a binding. This method is used in a few of our patterns. We have taken the Tired Dress as an example.
This is as easy and neat finish if you have an overlock machine.
I like my binding somewhere between 3 and 3,5cm wide. The length varies, so you can just cut it the same length as the neckline and then just cut the rest at the end.
Most of the new regular sewing machines also come with an overlock stitch option.
Serge one of the shoulders. 

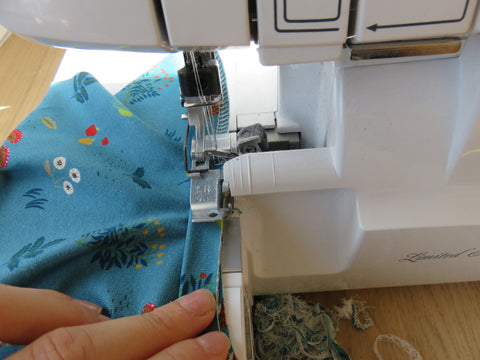

Fold the binding in two, with the wrong sides facing and serge it to the right side of the neckline. All three raw edges are facing out. Stretch the binding slightly as you sew, but do not stretch the neckline.


Depending on the amount of stretch your binding has, the might be some leftover at the end. If so, just cut it. Now it't time to topstitch the binding. Iron it first for better results. For the topstitching you have to use a stretch stitch or a zig zag stitch. If your machine has a stretch stitch, set it to the longest (3-4 mm). If you are zig zagging set it to a long and narrow zig zag. Start sewing at one end of the neckline all the way to the other. You should be sewing right next to the fold, over the overlocked seam. This way you will secure it to the inside.


Serge the other shoulder, carefully aligning the bindings.

Now secure the bindings at the end of the shoulder, as sewing a few times back and forward using a straight stitch.
This is it, you have finished your neckline in a few easy steps.

What a super tutorial, can’t wait to bind necklines this way with all my future makes 🎉